This getting started guide will guide you through creating their own Galaxy on the Cloud instance. It takes about 10 minutes to complete. There is also a video version of this documentation available here.
Step 0: Get your cloud credentials
Before you can start using cloud resources, you need to get your API access credentials for the given cloud. This step needs to be done only once for each cloud.
Amazon cloud
You first need to register here for an Amazon Web Services (AWS) account.
Once you have created an account, log into the AWS Management Console.
Next, it's necessary to create the API access credentials. Do this by creating an IAM user: click on Services → IAM → Users → Add user. Give the user a name (e.g., galaxy_cloudman), attach existing policies for EC2FullAccess and S3FullAccess. After reviewing the configuration, create the user. Once created, make a note of and download the API access credentials. Keep these credentials safe because they are all that is required to use your cloud account.


Jetstream cloud
To use the Jetstream cloud through our launcher (more below), it is required to create a TACC account. Head over to https://portal.tacc.utexas.edu/ and create a new account.
Next, it is necessary to obtain an allocation on Jetstream. If your collaborator or PI has an active allocation, they can add you to it. Otherwise, you need to get your own. Note that this process may take several days. To get started, follow the official instructions available here. Once you have an active allocation, you will be assigned a project ID, such as TG-CCR160022.
Step 1: Launch your cluster
In this step, we will create a new cluster by launching a virtual server in the cloud, which will act as the access point for Galaxy and the cluster.
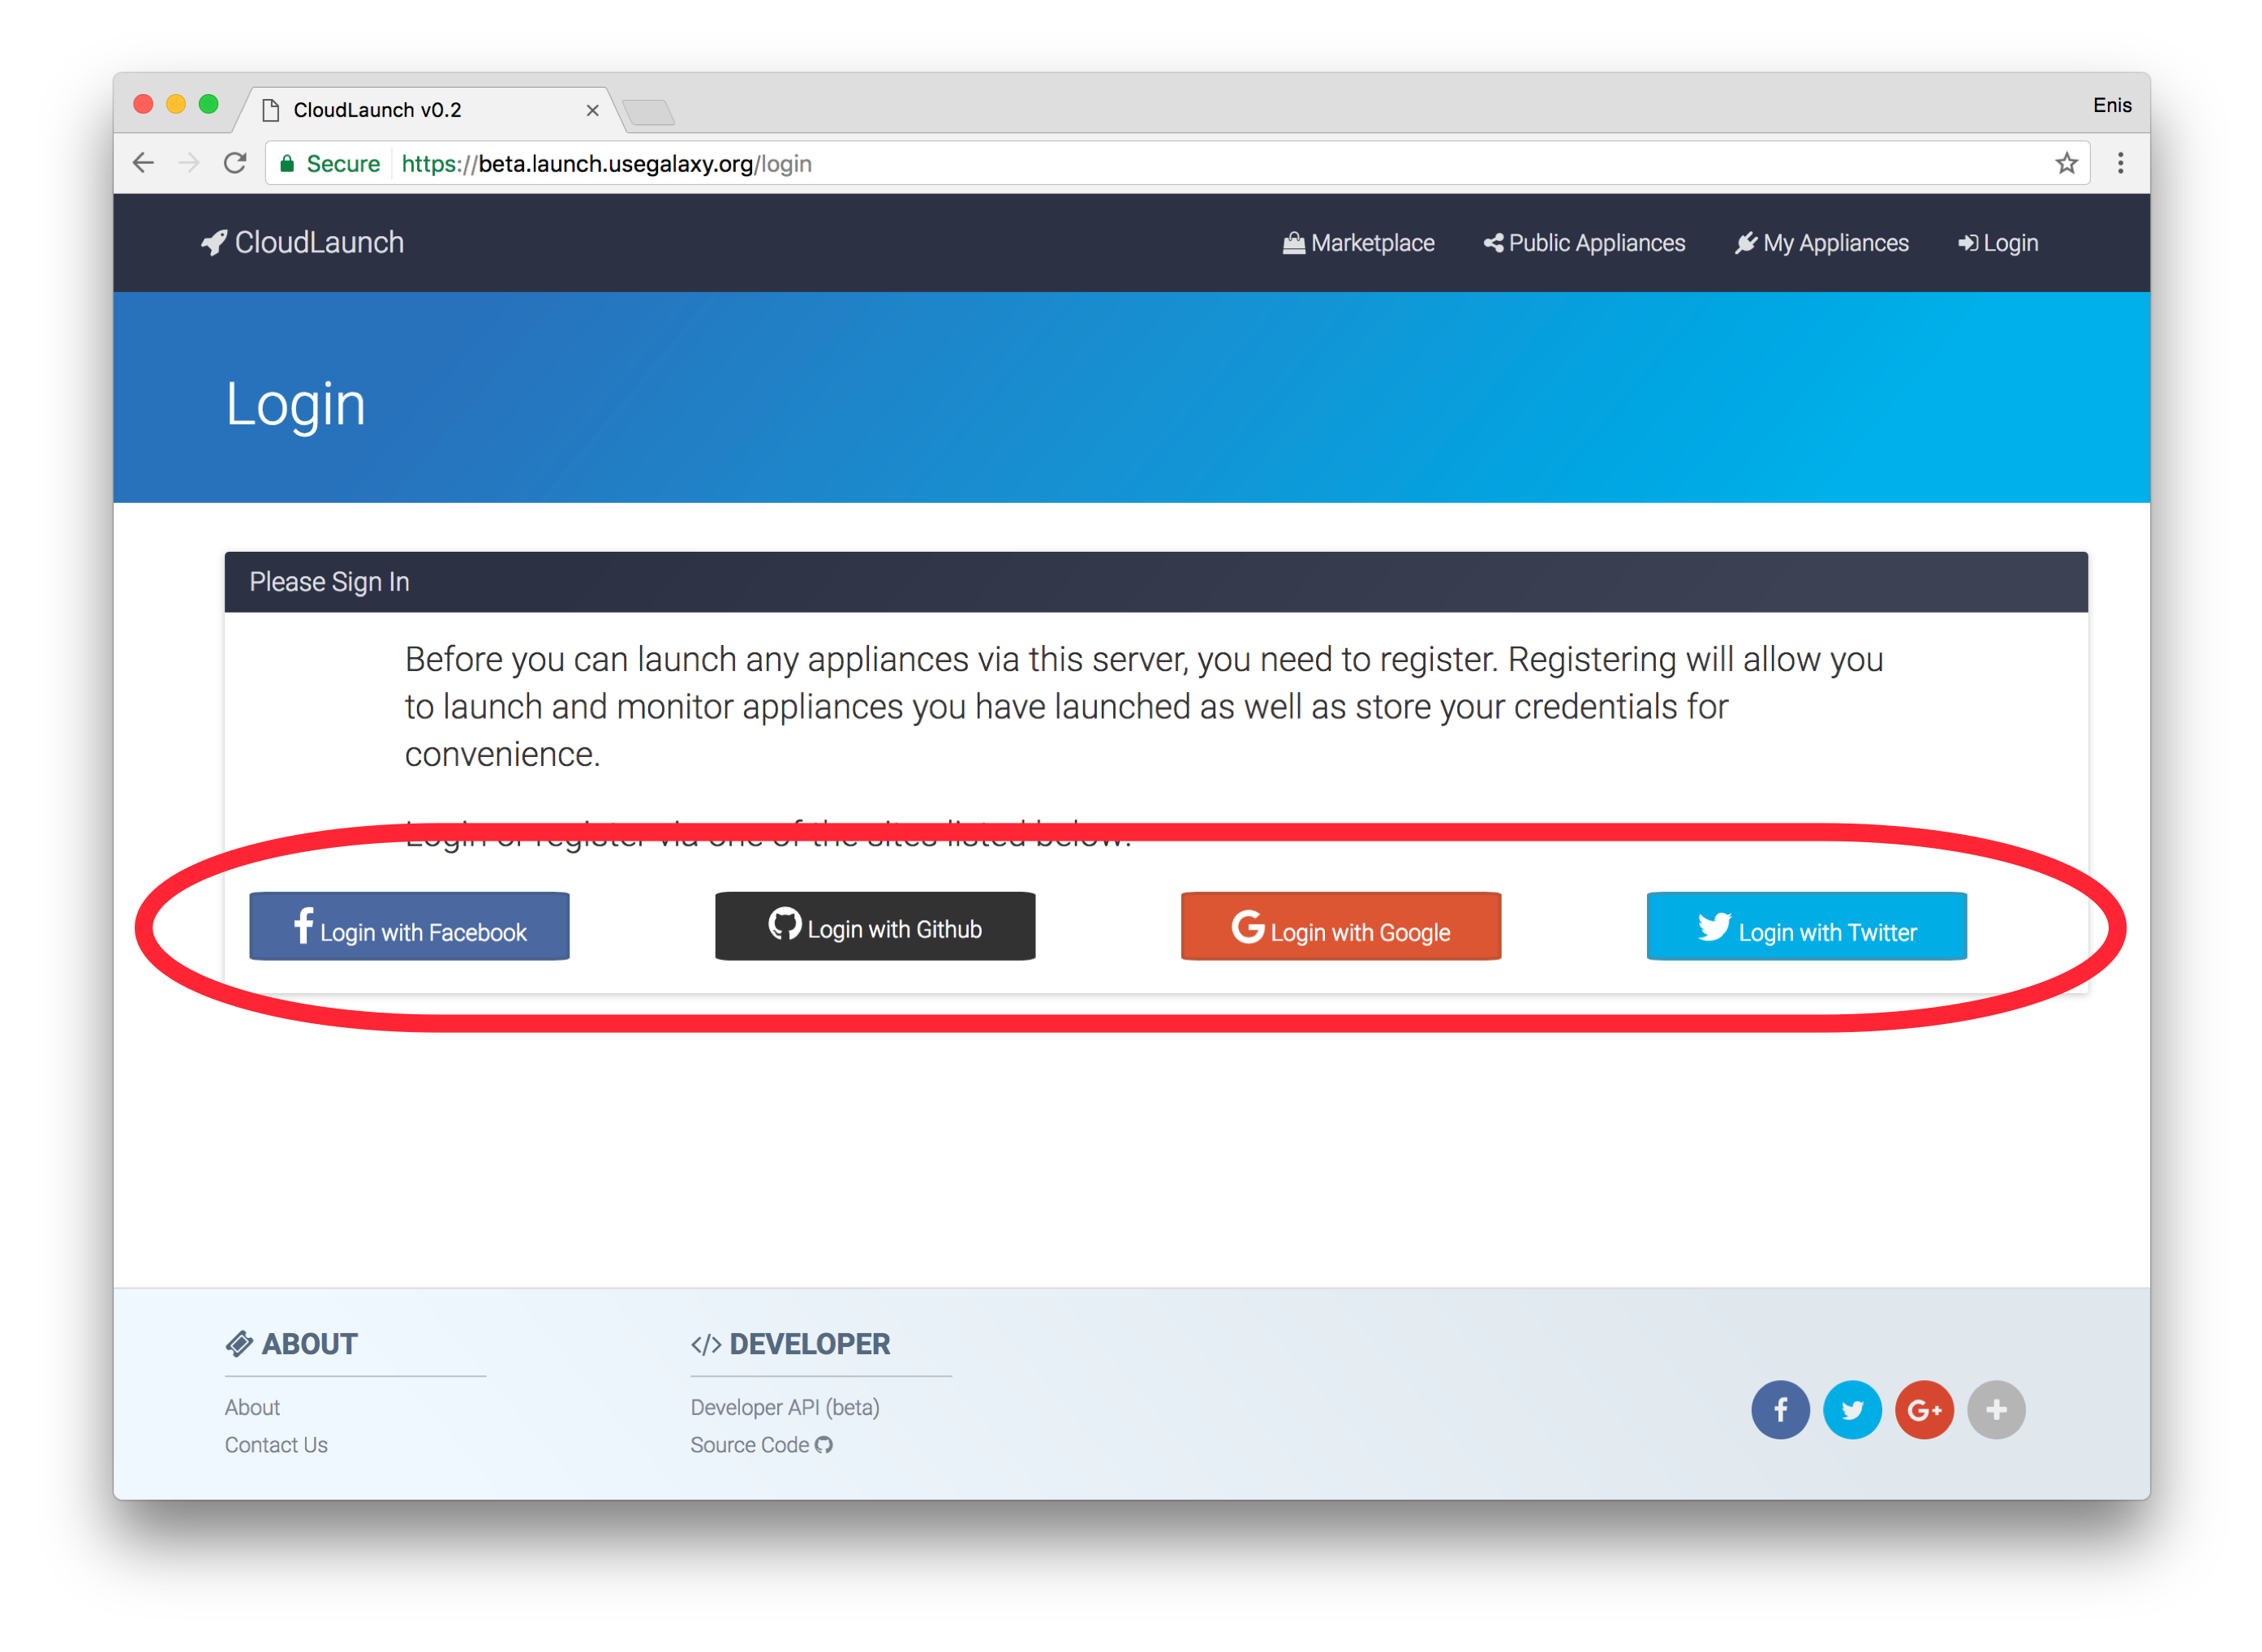
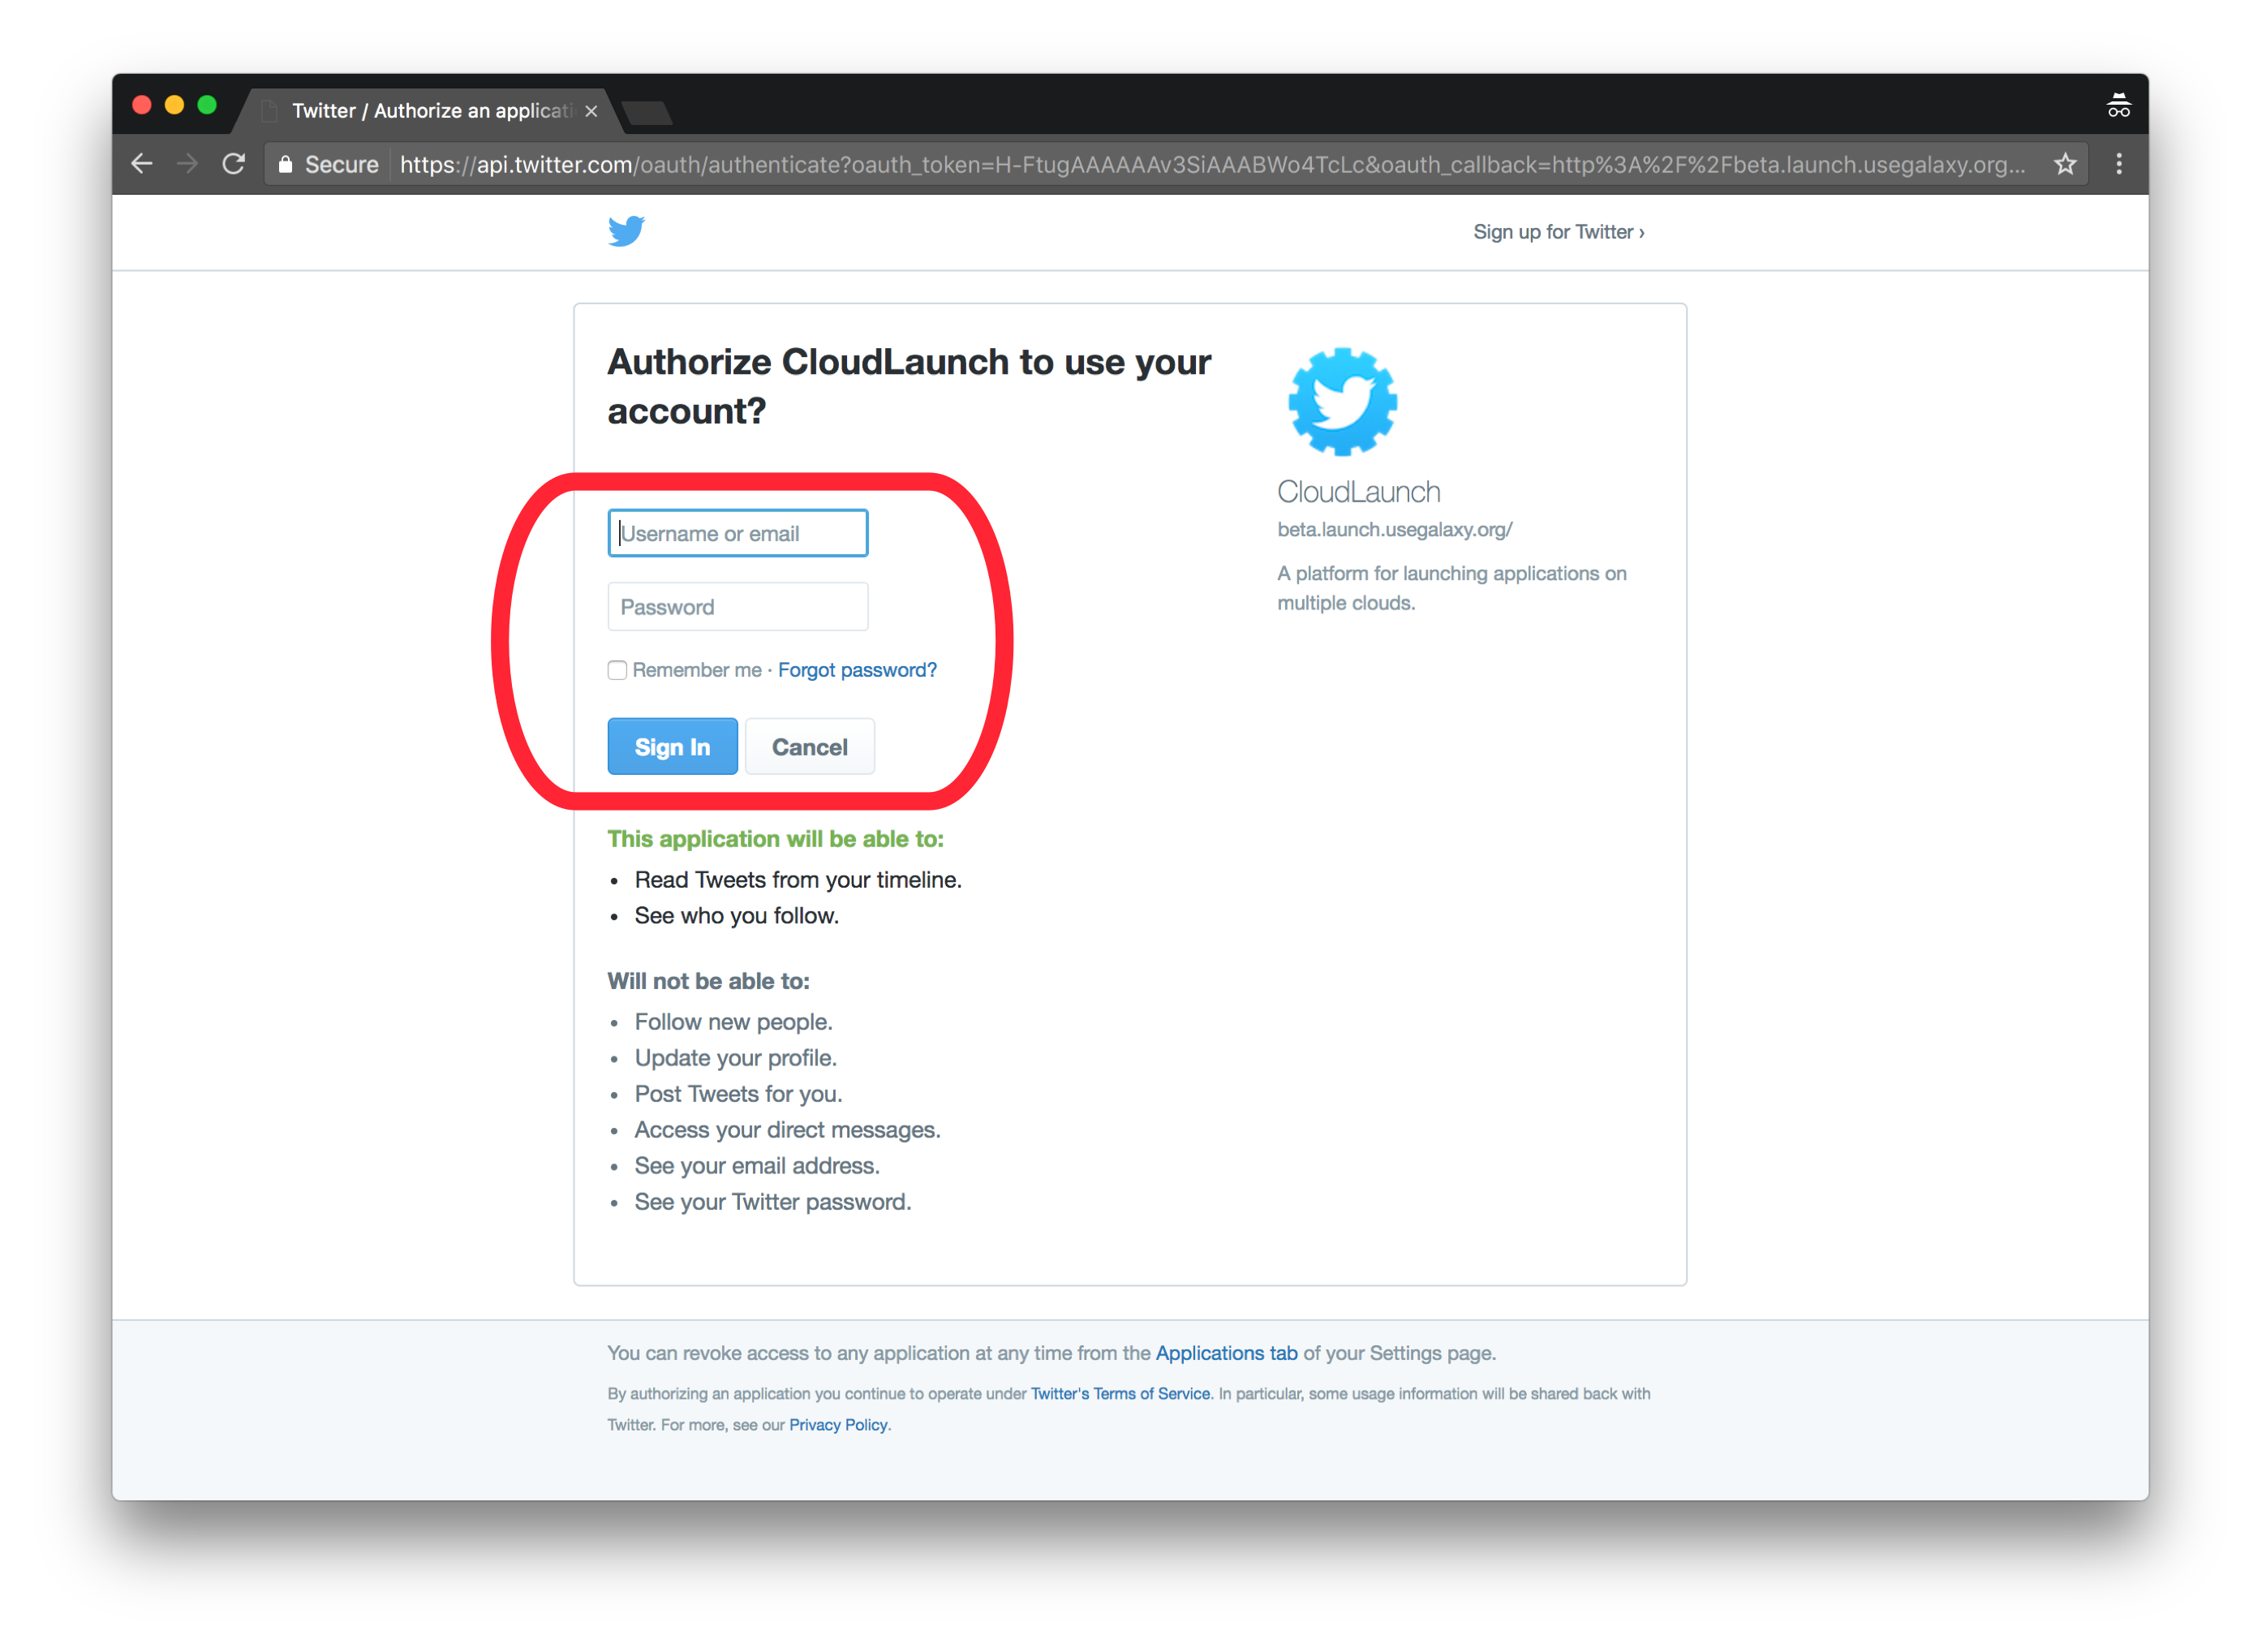
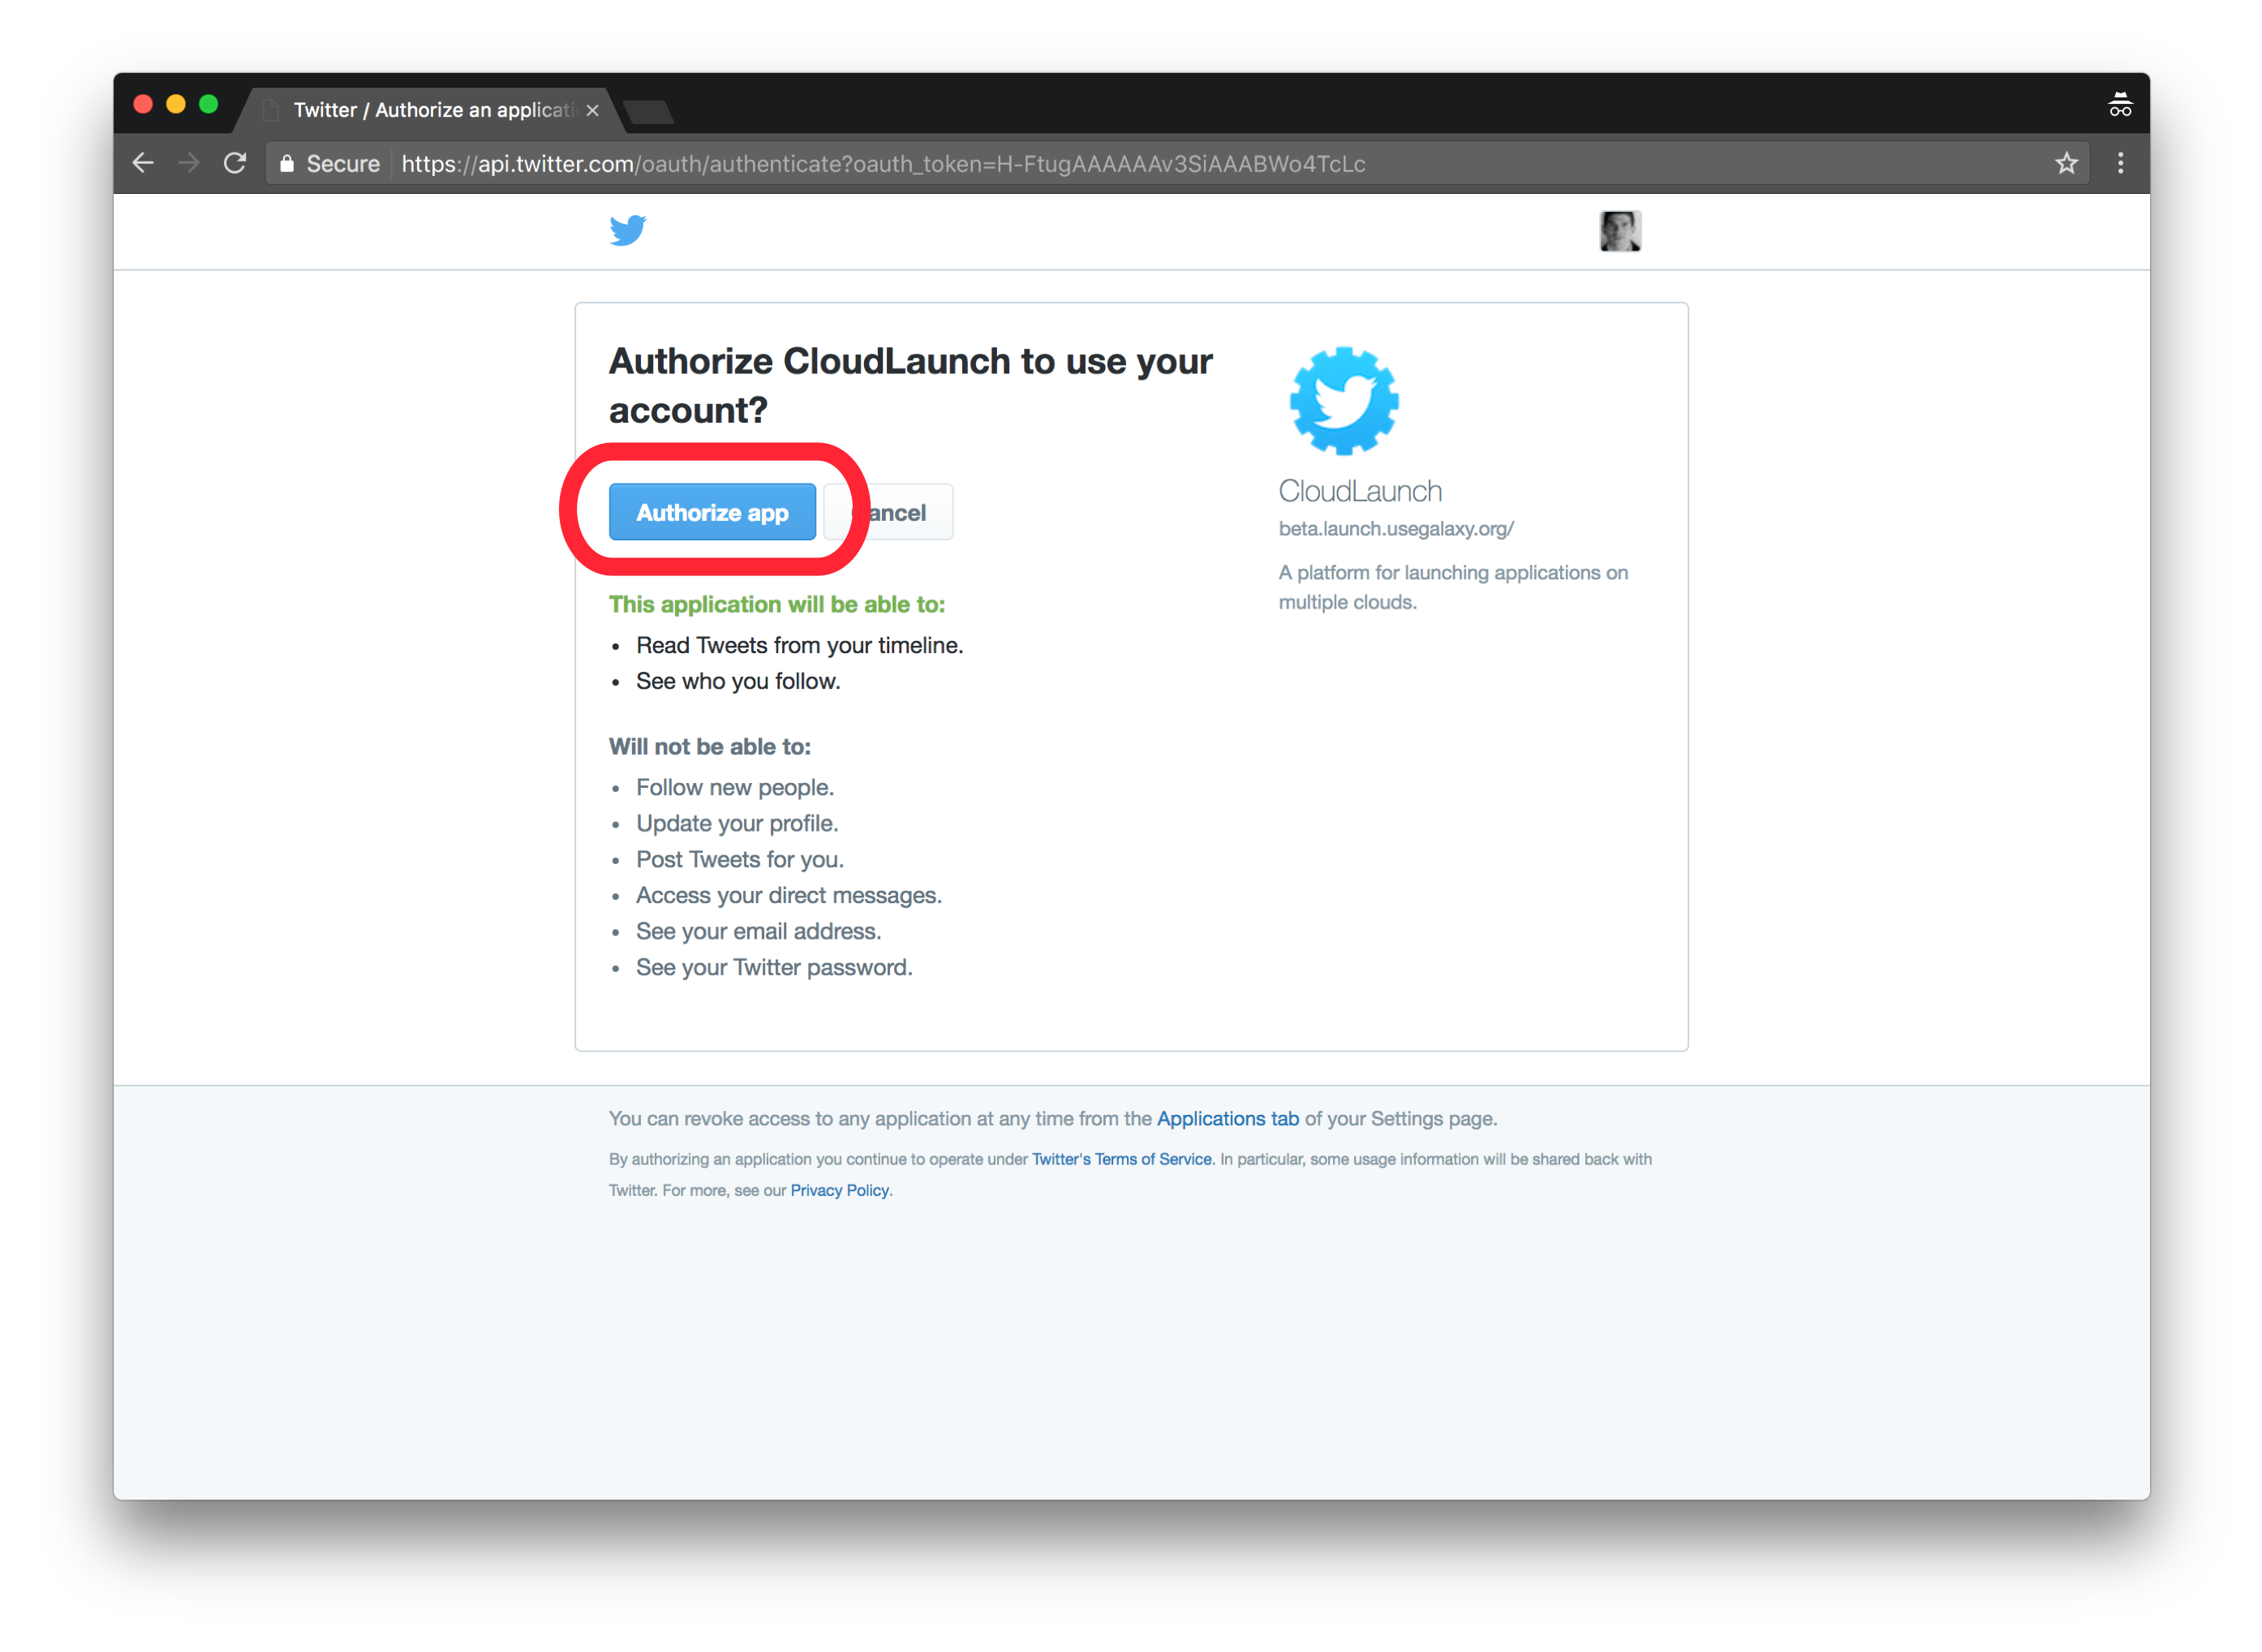
Head to the CloudLaunch application and login through one of the available authentication providers. First time logging in, it will be necessary to authorize CloudLaunch application to have access to your basic profile information. Note that each provider will create a separate account on CloudLaunch so remember which provider you use.
Once logged in, choose an appliance you would like to launch from the CloudLaunch Marketplace. CloudLaunch Marketplace is similar to an app store for cloud-enabled applications; it allows us to discover and launch a range of applications on different cloud computing providers. This time, choose the Genomics Virtual Laboratory (GVL) appliance.
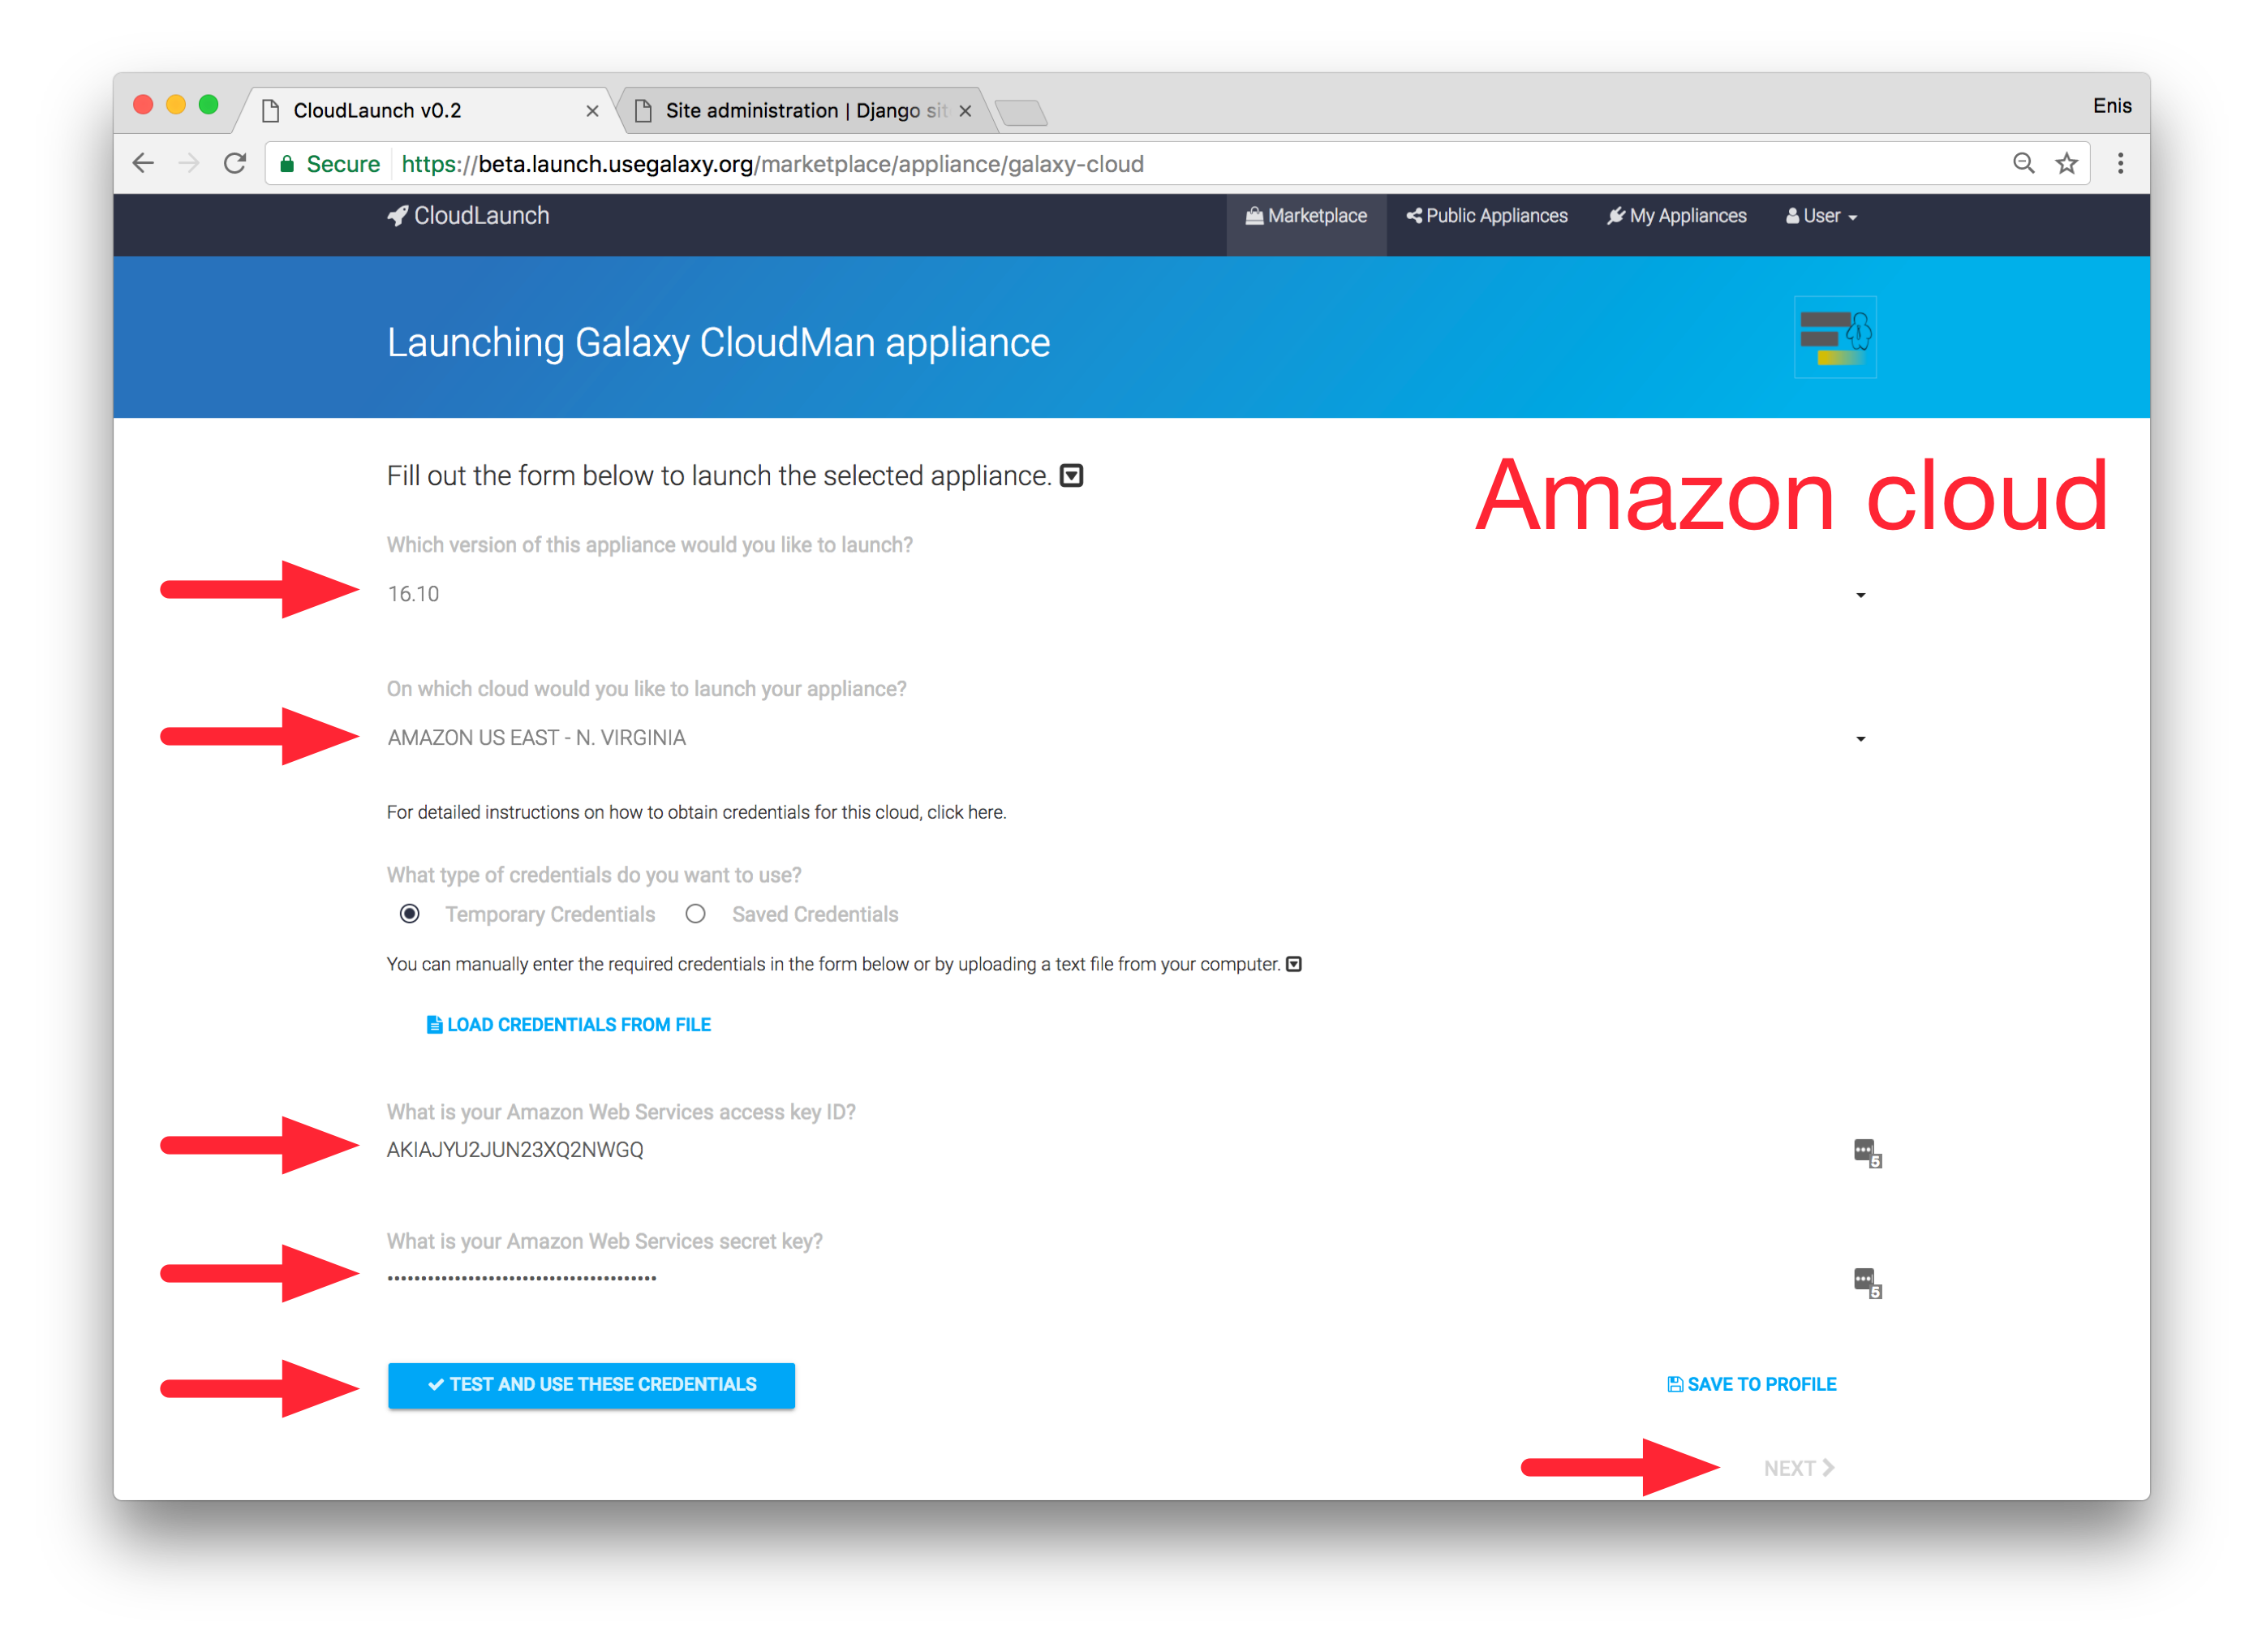
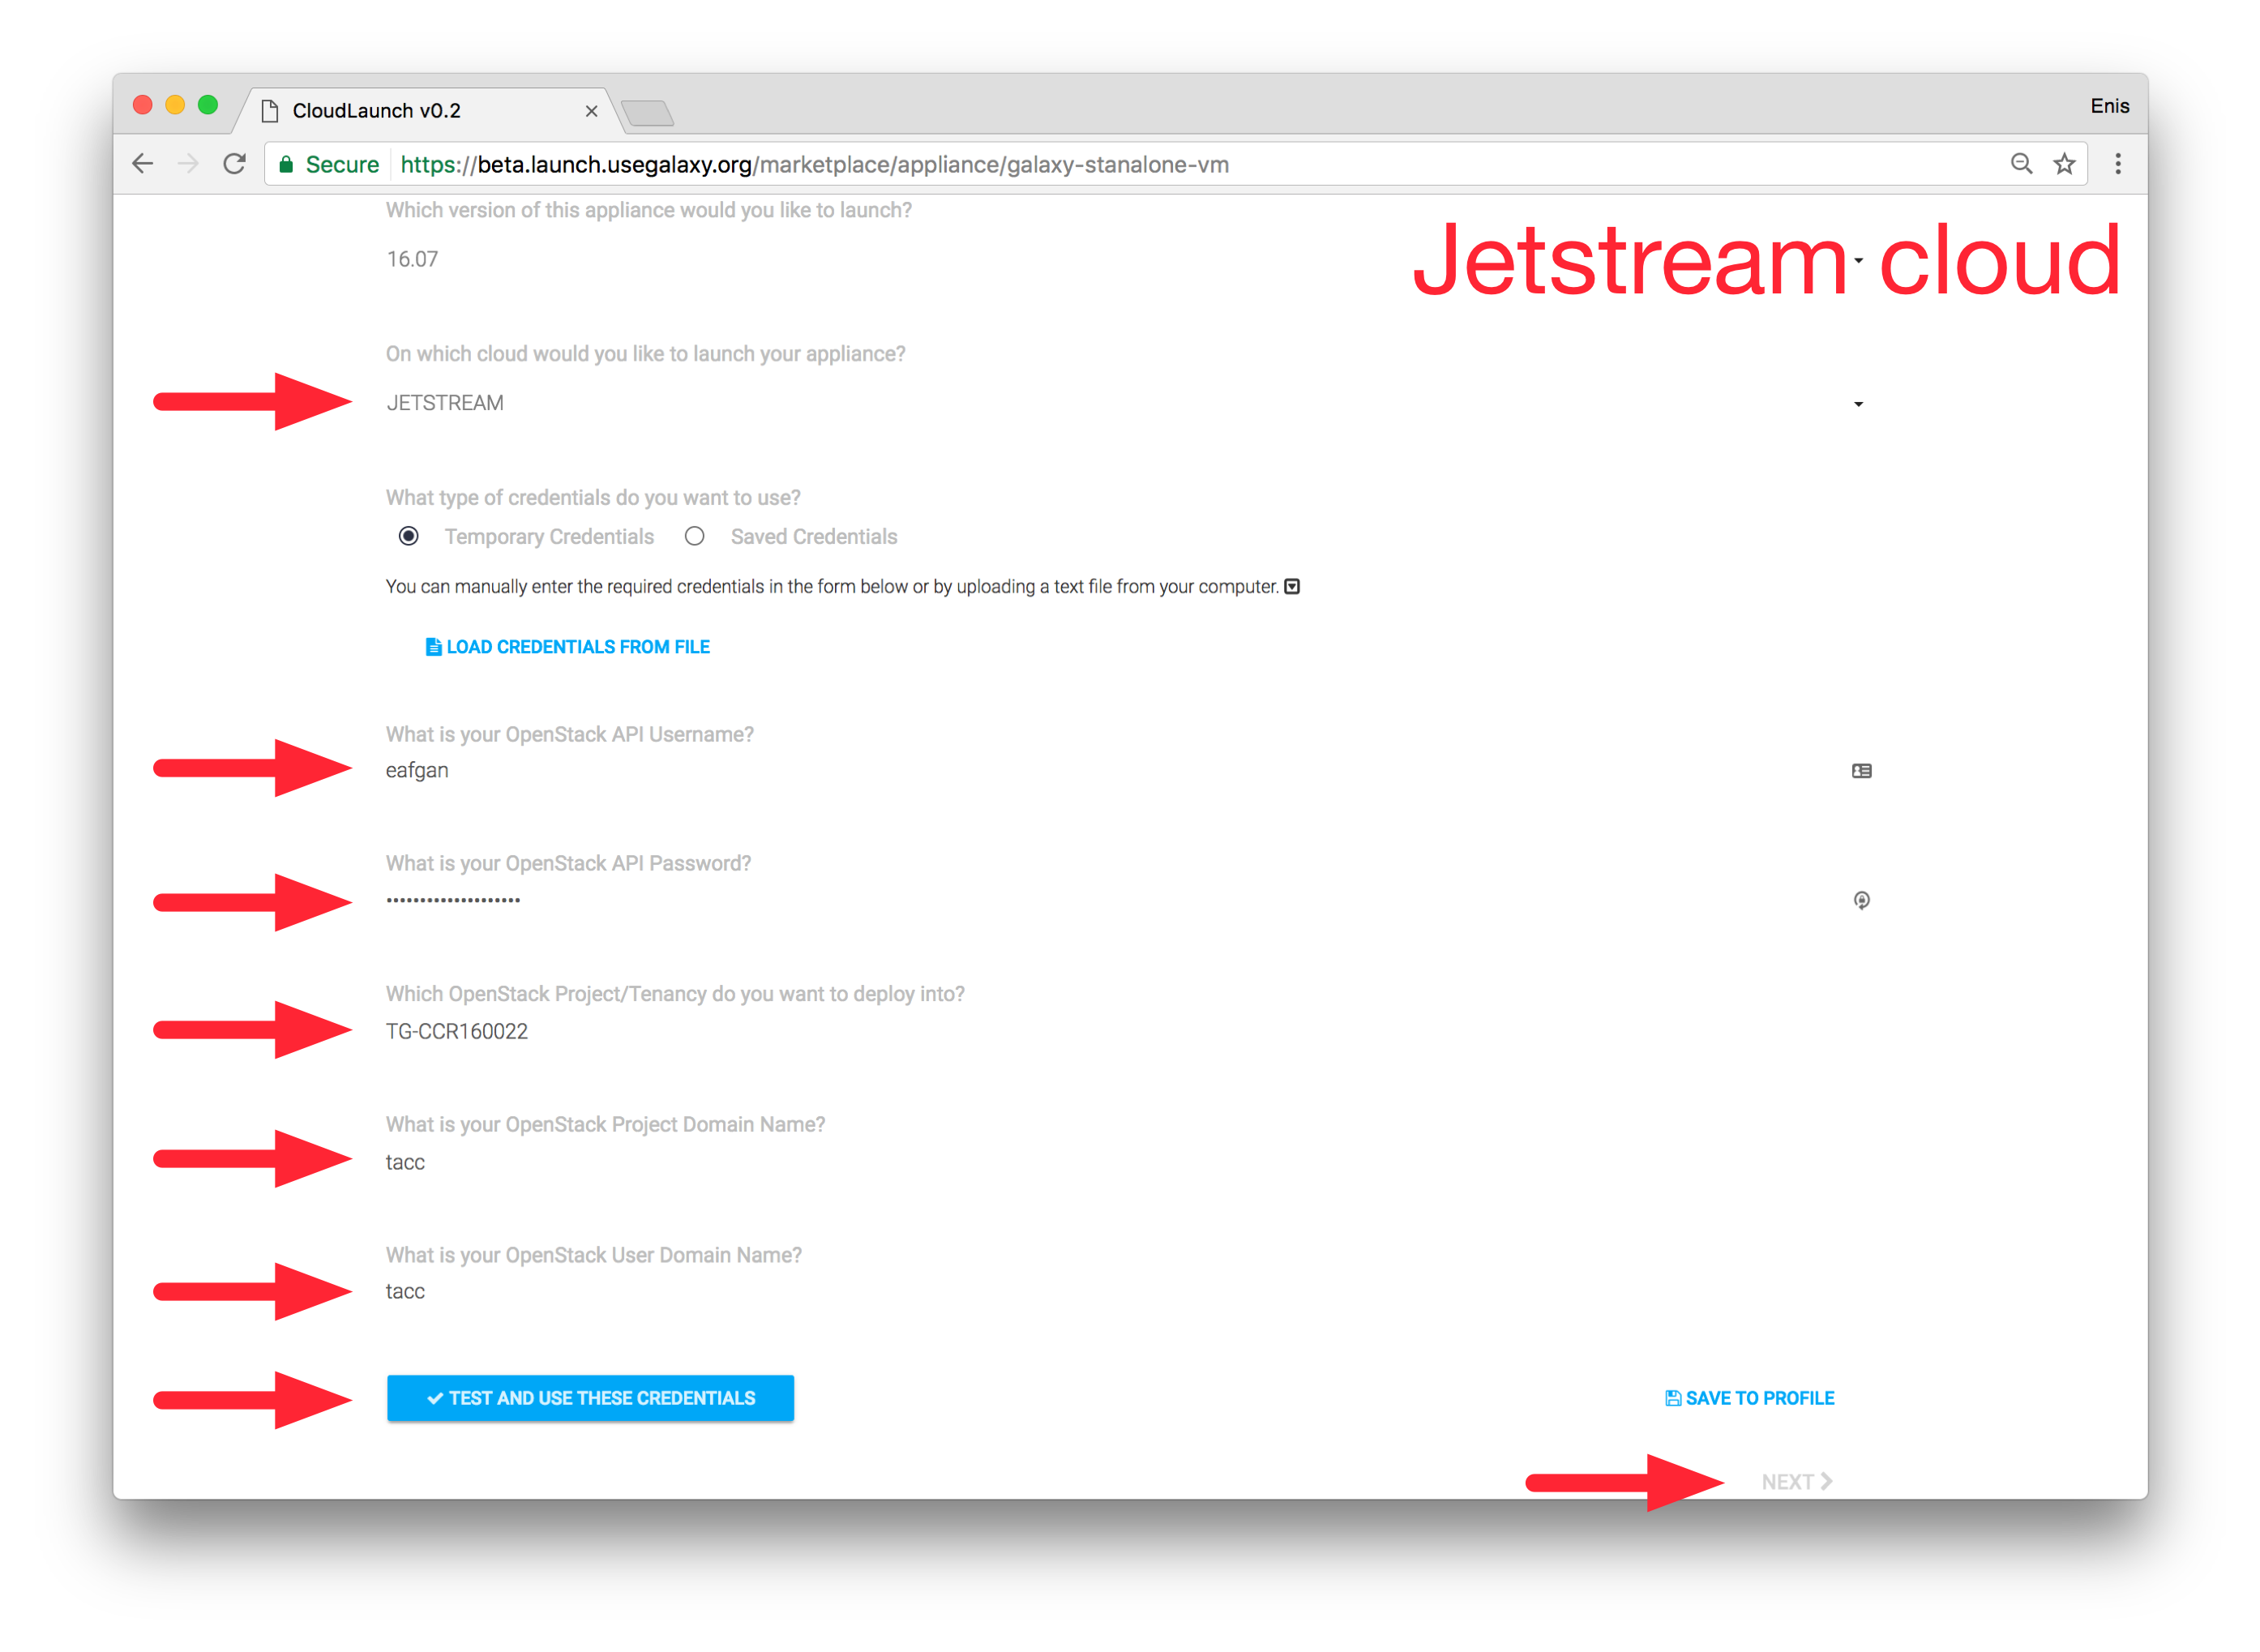
We now need to configure the appliance launch properties. This means choosing one of the available appliance versions, the target cloud infrastructure and providing the cloud access credentials. For the Amazon cloud, the access credentials are the API keys we obtained in step 0 above (e.g., AKIAJYU2JUN23XQ2NWGQ for the access key and K69vZAsvKKzqNl+M4kzCRuspIxzfwYBTa7sBs9Xb for the secret key). For the Jetstream cloud, these are the TACC credentials we registered with above as well as the allocation project ID. Further, project domain name and user domain name values are simply tacc. After supplying the credentials, click *Test and use these credentials, followed by clicking Next.
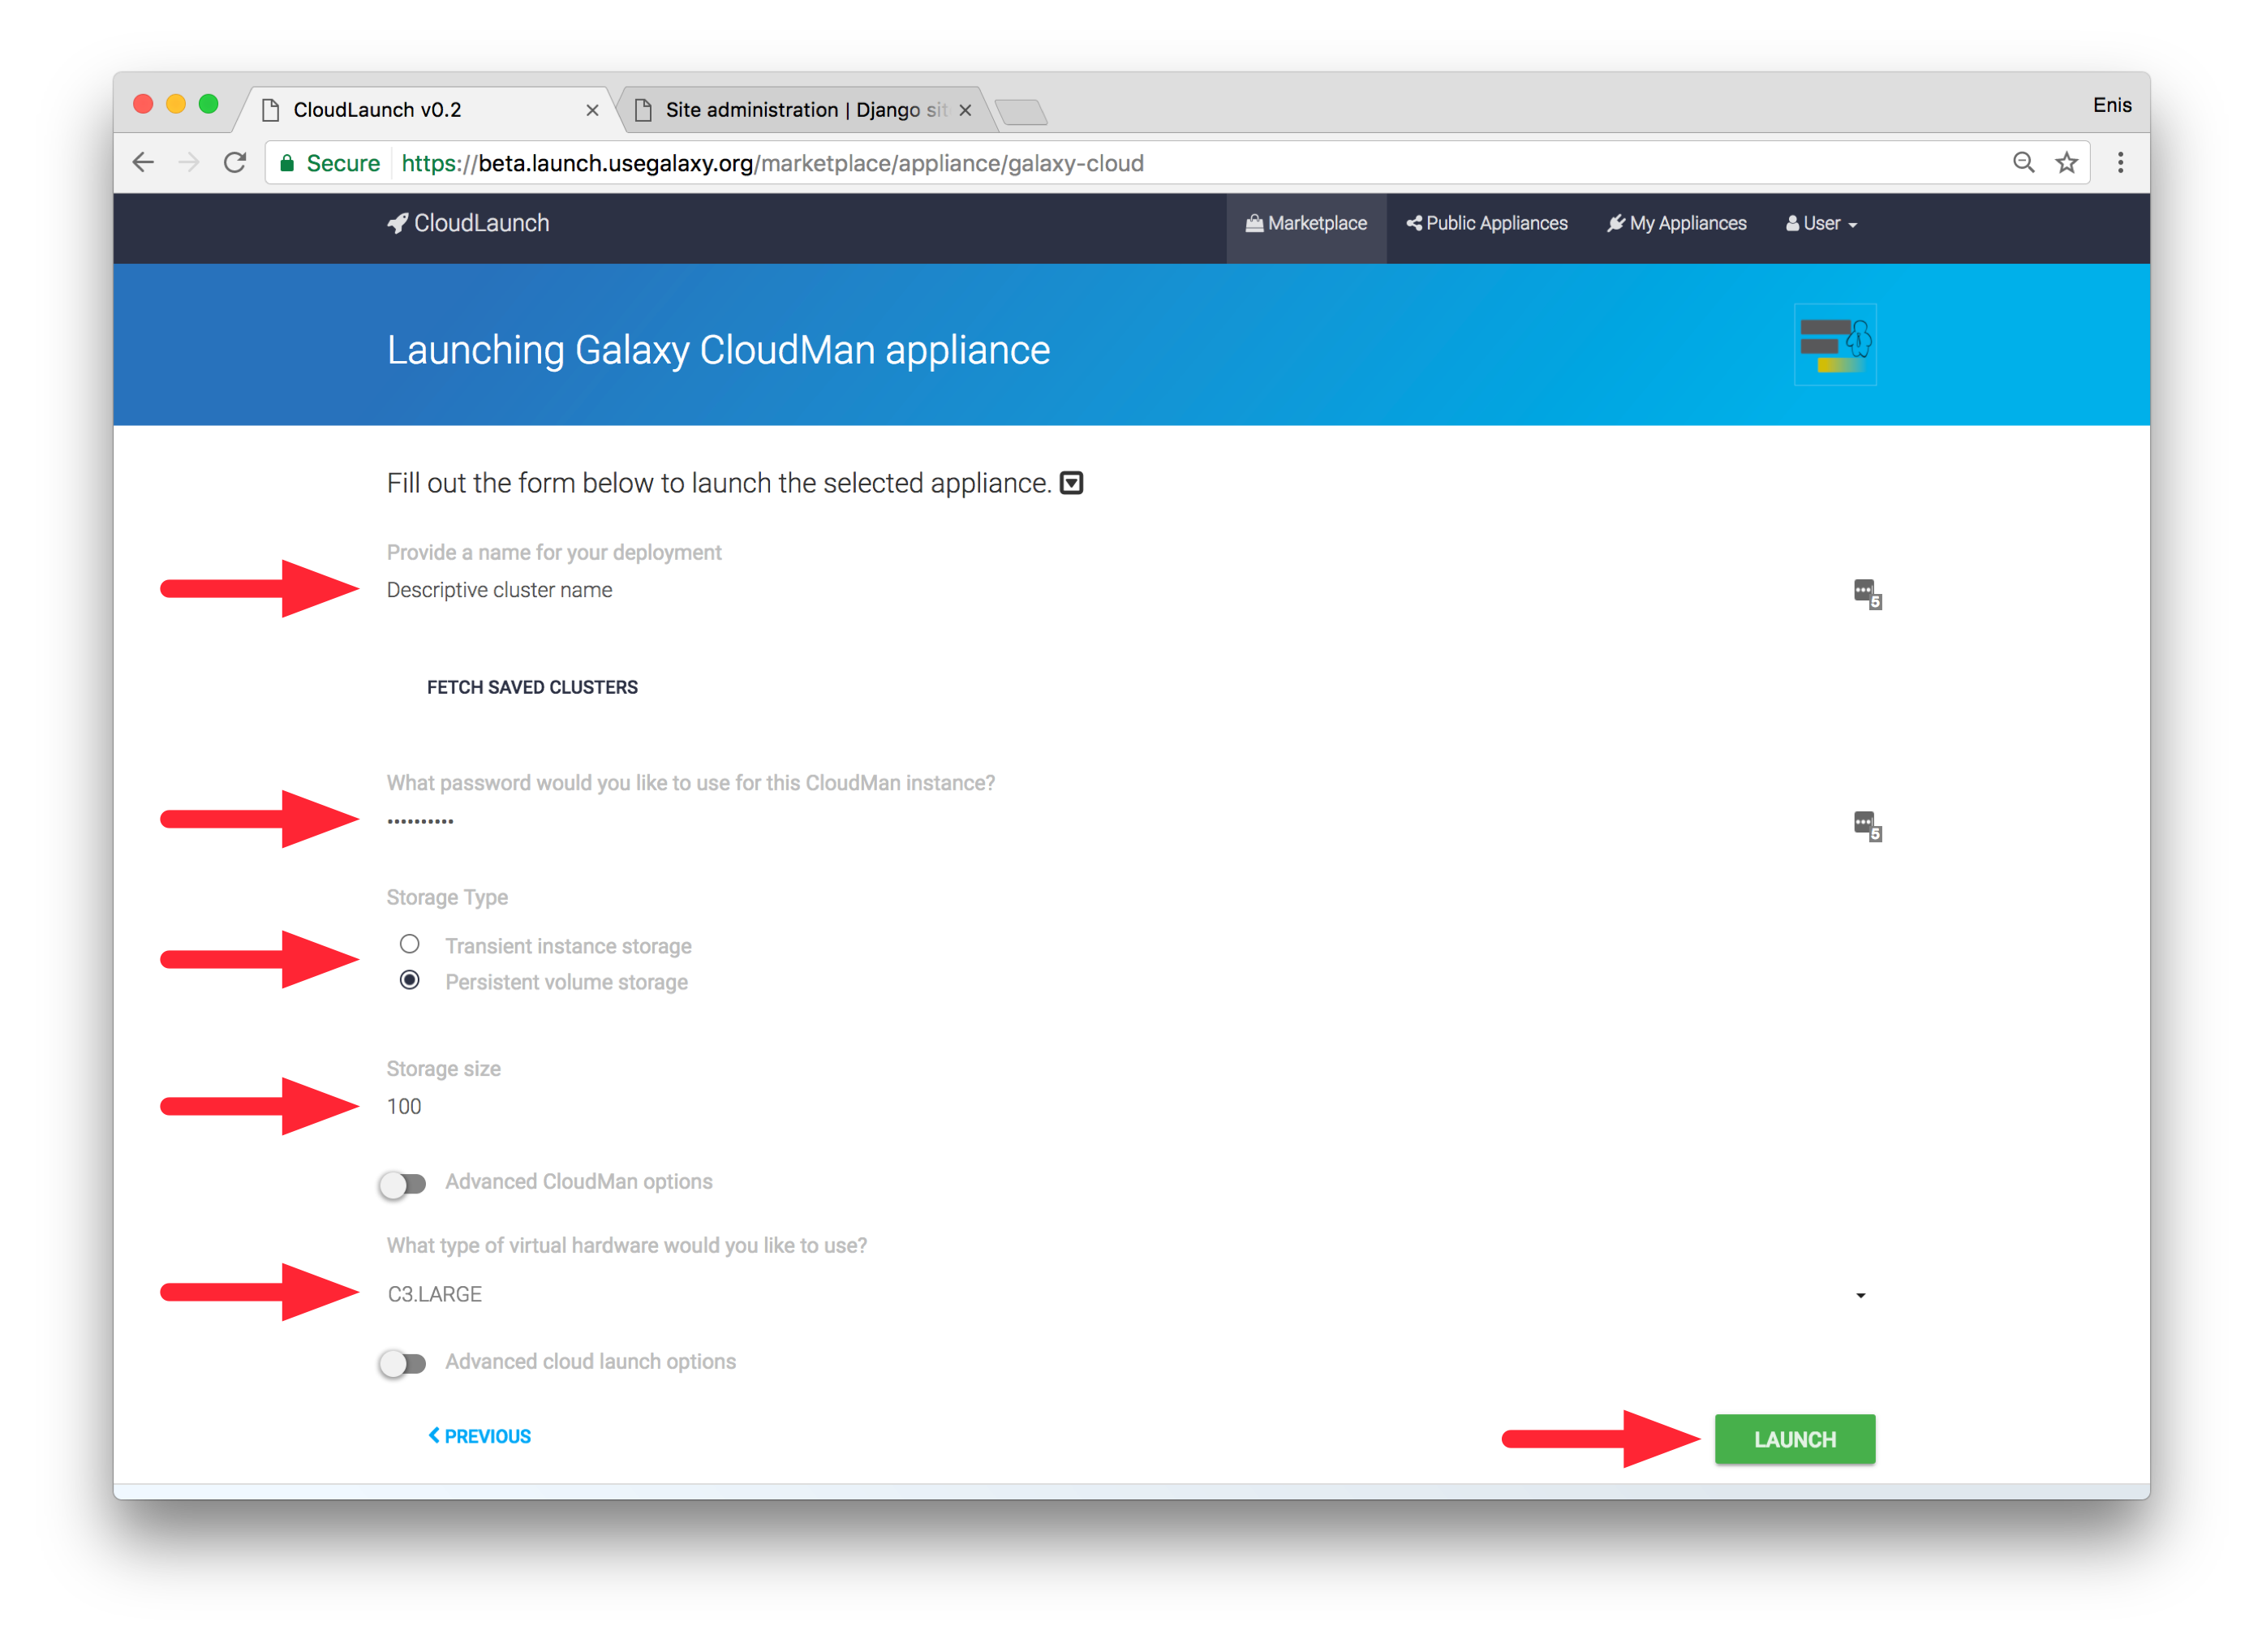
Before launching, we need to give our cluster a name. A default one is provided but feel free to replace it with something more suitable and descriptive. We also need to supply a password of choice that will protect access to the cluster once launched. Currently, the amount of storage available is fixed at 100GB. We can also choose the type of virtual hardware our server will use. Then click Launch.
Initiating the launch process will take us to the My appliances page, which is a log of all instances we have launched. Now we just wait for the cluster to start - it will take a few minutes. Once it has started, a URL to the appliance will be shown. Note that you can navigate away from this page during the launch process and return to it later while the launch process will continue uninterrupted.

[Optional] The first time you launch an appliance on a given cloud, you will be prompted to download an ssh key from the My Appliances page. This key allows you to ssh into the instance via the command prompt without a password, so keep it safe. Note that this key is available for download only the very first time you use a given cloud account. If you have missed to download the key, delete the key from within the cloud's management console (by default, called cloudlaunch-key-pair) and it will be automatically recreated the next time you start a cluster.


Step 2: Access CloudMan and Galaxy
After the cluster has started, we can access it by clicking the provided URL. Log in with username admin and the password you chose during the launch process. It may take a few more minutes to start Galaxy after the interface becomes available but clicking on the link under Access Address will lead you to Galaxy.
Depending on your interest, the documentation contains a wealth of information. Here are some places that might interest you: